Welcome to MathSeminar.jl
Last Modified: 2022年12月17日 土曜日
About this page
日本語(Japanese)
- 静的サイトジェネレータである Franklin.jl をベースに構築された Web ページです. Web ページの生成に使われたコードは全て MathSeminar.jl にて管理さてれています.
English(英語)
- This is my web page based on Franklin.jl. All codes used for creating this web site can be found at https://github.com/terasakisatoshi/MathSeminar.jl
Before reading
Remark 1.1.1 (推奨ブラウザについて)
Google Chrome からの閲覧を推奨します.(It is recommended to view it from Google Chrome.)
iPad などから Safari で閲覧する場合, 設定(ホーム画面の歯車アイコン) -> Safari -> デスクトップ用Webサイト まで進み「全てのWebサイト」を無効にします.(When using Safari from an iPad or other device, go to Settings (gear icon on the home screen) -> Safari -> Desktop Web Sites and disable "All Web Sites".)
Check Julia version
using InteractiveUtils
versioninfo()
Julia Version 1.8.3
Commit 0434deb161e (2022-11-14 20:14 UTC)
Platform Info:
OS: Linux (x86_64-linux-gnu)
CPU: 2 × Intel(R) Xeon(R) CPU E5-2673 v4 @ 2.30GHz
WORD_SIZE: 64
LIBM: libopenlibm
LLVM: libLLVM-13.0.1 (ORCJIT, broadwell)
Threads: 8 on 2 virtual cores
Environment:
JULIA_GPG = 3673DF529D9049477F76B37566E3C7DC03D6E495
JULIA_PATH = /usr/local/julia
JULIA_PROJECT = /work
JULIA_NUM_THREADS = 8
JULIA_VERSION = 1.8.3
Introduction to Franklin
Definition 2.0.1 (Franklin.jl について)
Franklin.jl は Julia で記述された静的サイトの生成を行うパッケージである.コーディング,数学などの技術ブログの作成をサポートする. 公式ドキュメントは https://franklinjl.org/ を参照せよ. なお,公式ドキュメントも Franklin.jl で作成されており, https://github.com/tlienart/franklindocs にてソースが公開されている.
Franklin.jl は Julia で記述された静的サイトの生成を行うパッケージである.コーディング,数学などの技術ブログの作成をサポートする. 公式ドキュメントは https://franklinjl.org/ を参照せよ. なお,公式ドキュメントも Franklin.jl で作成されており, https://github.com/tlienart/franklindocs にてソースが公開されている.
Proposition 2.0.2 (特徴)
Franklin.jl では次の機能を持っている
マークダウンで記述することができる.
数式のレンダリングは KaTeX を用いている.
$マークで挟むことで数式を表現できる.記述した Julia のコードを記述し, 対応する出力を自動で表示することができる.
グラフ描画結果を表示することができ, 数学の概念を可視化することができる.
HTML, CSS, JavaScript の知識があれば,ページの表示を変更することができる.
Example 2.0.3 (事後分布の定義)
真の分布 に従う 個の確率変数の組 , パラメータ を持つ確率モデル , パラメータの事前分布 から定まる逆温度 付きの の事後分布 を次で定義する:
ここで は の事後分布の正規化定数であり具体的には下記のように定義する:
Lemma 2.0.4
次のようにJuliaのコードを記述することができる:
次のようにJuliaのコードを記述することができる:
x = 3.141592
y = sin(x)
@show y
このとき, y の値は評価され次の出力を得ることができる:
y = 6.535897930762419e-7
Remark 2.0.5 (通し番号について)
通し番号は Franklin ではデフォルトでサポートしていない. CSS でカウンタを定義しておく必要がある.
通し番号は Franklin ではデフォルトでサポートしていない. CSS でカウンタを定義しておく必要がある.
newcommand によるタイピングの簡略化
config.md は文章を記述する上での設定を記述するために用いる. の \newcommand と同様に数式を記述するコマンドを簡略化できる.
Example 3.0.1 ( の例)
config.md に次を追加しておく:
\newcommand{\R}{\mathbb R}これで \R で を表記できる.
グラフの描画
PyPlot, gr,pyplot,plotlyjs をバックエンドとする Plots.jl, PlotlyJS.jl を用いた場合で確認している.
PyPlot
import PyPlot
PyPlot.figure(figsize=(8, 6))
x = range(-2, 2, length=500)
for α in 1:5
    PyPlot.plot(x, sinc.(α .* x))
end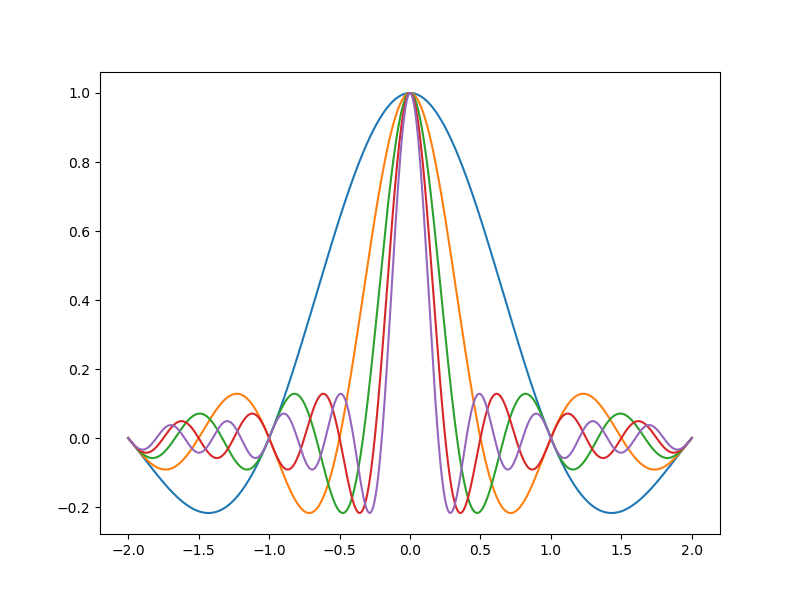
Plots (GR Backend)
using Plots
gr()
using LaTeXStrings
Plots.plot(rand(10), title=L"\alpha", xlabel=L"x", ylabel=L"y")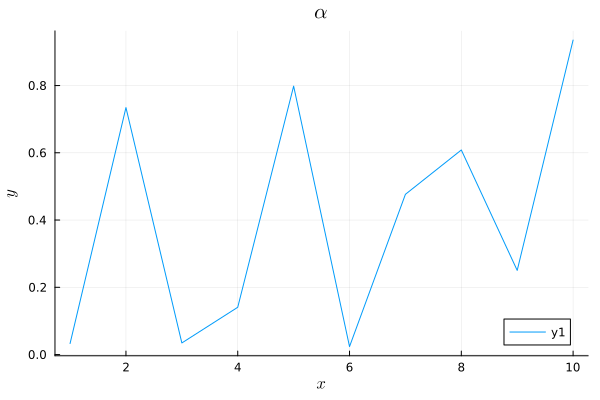
Plots (PyPlot Backend)
using Plots
pyplot()
Plots.plot(sin, title=L"y=\sin x")
gr()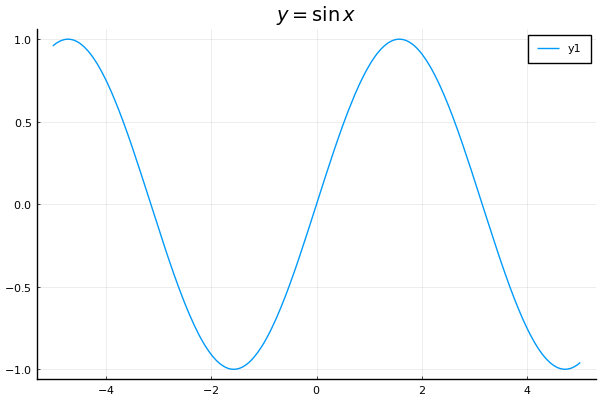
Remark 4.0.1 (Plotly/PlotlyJS について)
Plotly, または PlotlyJS による例はサイドメニューのページを参照Python のコードの実行結果の表示
config.md のコマンドを定義しておく.
\newcommand{\pycode}[2]{
```julia:!#1
#hideall
using PyCall
lines = replace("""!#2""", r"(^|\n)([^\n]+)\n?$" => s"\1res = \2")
py"""
$$lines
"""
println(py"res")
```
```python
#2
```
\codeoutput{!#1}
}
そして該当する Markdown ファイルに例えば下記のように \pycode コマンドと組み合わせたものを記述しておく.
Proposition 5.0.1 (ソースコードの表示)
Pythonのコードの実行結果を貼り付けることができる.
Pythonのコードの実行結果を貼り付けることができる.
\pycode{py1}{
import numpy as np
np.random.seed(2)
x = np.random.randn(5)
r = np.linalg.norm(x) / len(x)
np.round(r, 2)
}
と記述することで下記のようになる:
import numpy as np
np.random.seed(2)
x = np.random.randn(5)
r = np.linalg.norm(x) / len(x)
np.round(r, 2)
0.65
C のコードの実行結果を表示
Proposition 6.0.1 (ソースコードの表示)
つぎのように C のコードを貼り付けることができる.
つぎのように C のコードを貼り付けることができる.
#include <stdio.h>
int main(){
    printf("Hello Pika\n");
    return 0;
}
まず, config.md に次を記述しておく:
<!-- display C code with syntax highlight-->
\newcommand{\Ccode}[2]{
```julia:!#1
#hideall
using Markdown

mdC_code = Markdown.htmlesc(raw"""!#2""")

mdfile = joinpath(dirname(@OUTPUT), "!#1.md")
open(mdfile,"w") do f
    print(f, mdC_code)
end

C_code=raw"""
!#2
"""

exefile = tempname()

#=
This trick is taken from

https://discourse.julialang.org/t/how-to-make-a-c-function-compiled-by-myself-available-to-ccall/7972/26
=#

open(`gcc -Wall -O2 -march=native -xc -o $exefile -`, "w") do f
    print(f, C_code)
end

run(`$exefile`)
```

\input{c}{!#1.md}
}

<!-- run C code and display code and its result -->
\newcommand{\Cexec}[2]{
\Ccode{!#1}{!#2}

\codeoutput{!#1}

}
そして次のようにタイプする
\Cexec{how2embeddC}{
#include <stdio.h>
int main(){
    printf("Hello Pikachu\n");
    return 0;
}
}
出力結果は次のようになる.コードはハイライトされ,対応する main 関数のコードの実行結果を出力する:
#include <stdio.h>
int main(){
    printf("Hello World\n");
    return 0;
}
Hello World
Remark 6.0.2 (Cのコードのハイライト)
Getting hightlight.js から ハイライトしたい言語を選択した後
Getting hightlight.js から ハイライトしたい言語を選択した後
highlight.pack.js を _lib/hightlight にコピーする. もともと _lib/highlight/highlight.pack.js が配置されているが、Julia,Python,R、Markdownのみをハイライトするようになっている。コードの挿入
単にコードを載せたい場合は
\input{filetype}{filename}とすれば良い. 例えば
\input{julia}{hello.jl}と記述しておく. 結果は次のようになる.
println("Hello")hello.jl の実態はソースコードの _assets/index/code/hello.jl に存在する.
© SatoshiTerasaki. Last modified: 2022年12月17日 土曜日. Website built with
MathSeminar.jl
Franklin.jl.